How to Tint Your Eyebrows at Home Waking up with full and well-shaped eyebrows without needing makeup feels like a real beauty win. When you do it right, eyebrow tinting at home can last between three and six weeks. The important thing is to work carefully and precisely so your brows look natural and balanced instead of too dark or patchy. This guide shows you how to tint your eyebrows safely and cleanly at home without making a mess. What You Need Before Starting Getting the right supplies makes the whole process easier. You need an eyebrow tinting kit that includes dye & developer. Most kits come with a small mixing dish and an applicator brush. You also need petroleum jelly to protect the skin around your brows. Cotton swabs help clean up any mistakes. A timer is essential because leaving the dye on too long creates problems. Have a damp washcloth ready for removal.
Why Home Brow Tinting Is Worth Trying
At-Home Brow Tinting: A Practical Beauty Solution Tinting your eyebrows at home delivers benefits that go beyond simple convenience. When you purchase a tint kit you get enough product for several uses instead of paying for a single salon session each time. This approach puts you in charge of how dark or light you want the color and how soft the front of your brows should look. The tint stays visible on your brow hairs for three to six weeks. Any color that accidentally gets on your skin will fade much faster in about five to seven days. This creates a natural-looking result that gradually lightens over time. The real advantage is flexibility. You can adjust the shade or change how long you leave the tint on whenever you want. This matters when you dye your hair a different color or when you switch up your makeup routine as seasons change. Taking care of this one small detail makes your whole face look more finished and neat even when you skip makeup entirely.
Understanding How Long Tints Really Last
How Long Does Brow Tint Last? The duration of your brow tint varies based on your skin type and how you care for your brows after treatment. The pigment stays in the actual brow hairs much longer than it does on your skin. This explains why the color gradually fades instead of vanishing all at once. Factors That Affect Longevity If you have dry or normal skin and use mild cleansers your brow color will remain clear for three to six weeks. The tint on your skin will fade after about one week. People with oily skin will notice faster fading. The same applies if you swim often or spend significant time in strong sunlight. In these cases the color typically starts to fade within two to three weeks. Using heavy oils or balms around your eyebrows speeds up fading. Exfoliating products have the same effect. These products remove pigment from the skin more quickly.
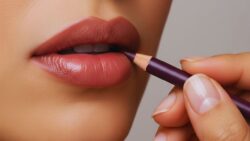 Lip Definition Trick: The Precise Liner Technique That Creates Fuller Lips Without Overlining
Essential Tools and Products to Prepare
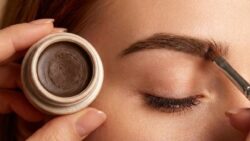
You do not need professional equipment but having the right basics helps you get even color and safer outcomes. Use brow-specific tint or gel that does not contain ammonia. Get the developer or oxidant that the brand recommends. You will need a glass or plastic mixing cup & spatula. An angled or precision brow brush works well for application. Keep cotton pads and cotton swabs nearby. Apply thick cream or petroleum jelly around your brows to protect your skin. Wear gloves & have a clean spoolie ready. Keep micellar water or gentle toner available for cleanup. Use a timer or your phone stopwatch to track the processing time. Safety is important. Do not use regular hair dye on your eyebrows. Some dyes can cause serious eye injuries. Ingredients like PPD (p-phenylenediamine) may cause allergic reactions on sensitive facial skin.
Patch Test: A Must-Do Safety Step
Before you apply any tint you should test a small amount of the mixed product behind your ear or on the inside of your elbow. Leave that spot uncovered for 48 to 72 hours. If you see redness or itching or swelling or blistering then the product is not safe for you to use. This simple step helps you avoid uncomfortable and very visible reactions near your eyes.
Seven Steps for Perfect Salon-Like Brows
How to Tint Your Eyebrows at Home Start by removing only the obvious stray hairs that sit outside your natural brow line. Don’t make your brows thinner by plucking too much from the main shape. You can use a pencil to mark where you want your brows to be & then clean the skin with micellar water so the tint sticks properly. Protect Your Skin Put a thin layer of thick cream or petroleum jelly around the edge of your brows where you drew the outline. Keep this barrier off the actual hairs. This step stops the tint from staining your skin and helps you get clean lines.
Common Tinting Errors and How to Avoid Them
Common Eyebrow Tinting Mistakes to Avoid Not doing a patch test beforehand can cause unexpected skin irritation or allergic reactions. Many people skip this step to save time but it’s essential for safety. Picking a shade that’s too dark or too warm creates an artificial appearance that doesn’t match your natural coloring. The tint should complement your hair color and skin tone rather than overpower your features.
A Simple Step That Elevates Your Look
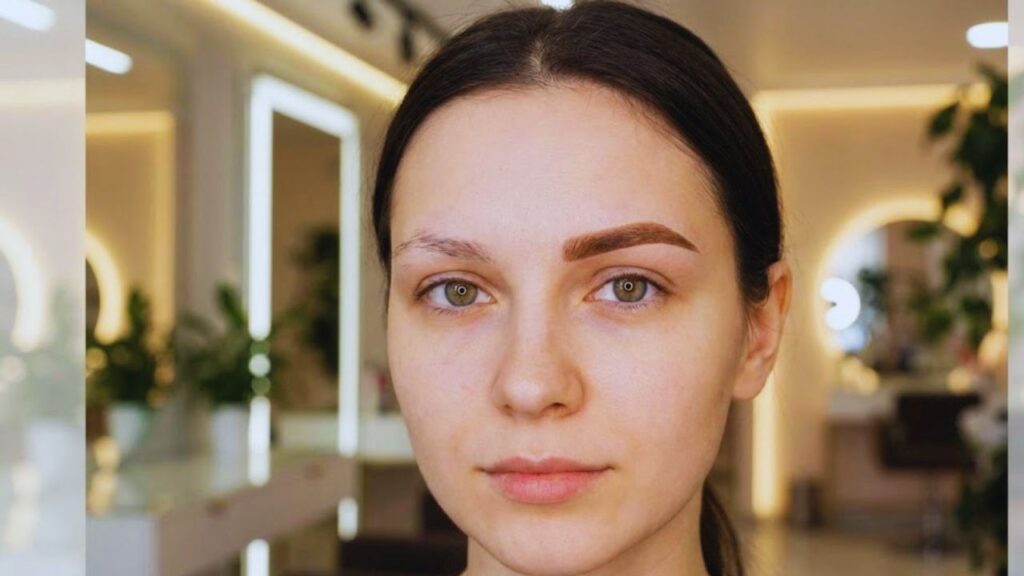
A good brow tint makes a real difference. Your skin looks fresher and your eyes become more noticeable. Even without makeup your face looks put together. When you prepare properly and use safe products and take care of your brows afterward you can tint them at home with confidence. The results last for weeks and give you easy definition. After you figure out what works best for you it becomes a beauty step you will always want to include in your routine.